Technical Parameters
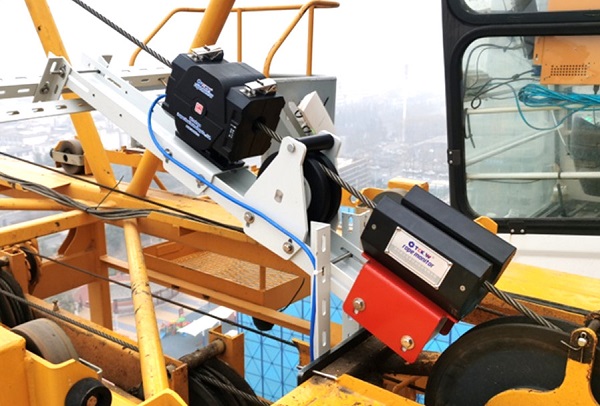
(1) Inspection range of wire rope: Φ16-80mm;
(2) LMA inspection uncertainty: <±1%;
(3) Flaw positioning accuracy:≥99%;
(4) Inspection speed: 0-6m/s;
(5) Monitoring speed: 0-20m/s;
(6) Passing-through capability: Non-interferencewith warp, grease or deformation;
(7) Clearance between sensor and wire rope: 10-30mm;
(8) Max. amplitude of wire rope: <10mm;
(9) Sensor sensitivity: 1.5V/mT;
(10) Signal-to-noise ratio: S/N>85dB;
(11) Max. sampling rate: 2048times/m;
(12) Working voltage: AC220V±10%/50/60 Hz;
(13) Communication network: WIFI or industrial Ethernet;
(14) Docking communication protocol: TCP/IP, Modbus;
(15) Ingress protection: IP67;
(16) Working environment: -40℃-+60℃/RH 95%;
(17) Continuous working hours: ≥168h;
(18) Service life of equipment: ≥10 years;
Flaw Detectability
● Severe flaw: LMA reaches 8%-10% , real-time detectability 100%
● Serious flaw: LMA reaches 6%-8% , real-time detectability 100%
● Medium flaw: LMA reaches 4%-6% , real-time detectability 100%
● Minor flaw: LMA reaches 2%-4% , real-time detectability >99%
● Slight flaw: LMA reaches =2% , real-time detectability >95%
LMA reaches >1% , real-time detectability >95%
Inspection Repeatability
● Severe flaw: 100%,flaws inspection waveforms basically coincide
● Serious flaw: 100%,flaws inspection waveforms basically coincide
● Medium flaw: 100%,flaws inspection waveforms basically coincide
● Minor flaw: >99%,flaws inspection waveforms basically coincide
● Slight flaw: >95%,flaws inspection waveforms basically coincide
Inspection Accuracy
●Steel wire rope, coiled tubing metal cross-sectional area (LMA) loss rate detection error: < ±1%
● Broken wires quantitative error i n one lay length: <1 wire*
●Steel wire rope, coiled tubing dia. measure error: ±1%*
●Steel wire rope, coiled tubing measuring error of wire rope length:<0.2%
●Flaw positioning accuracy:≥99%;
What can
I do-——It can inspect all kinds of wire rope flaws such as internal, external broken wire,
abrasion,
corrosion, deformation, fatigue etc.


